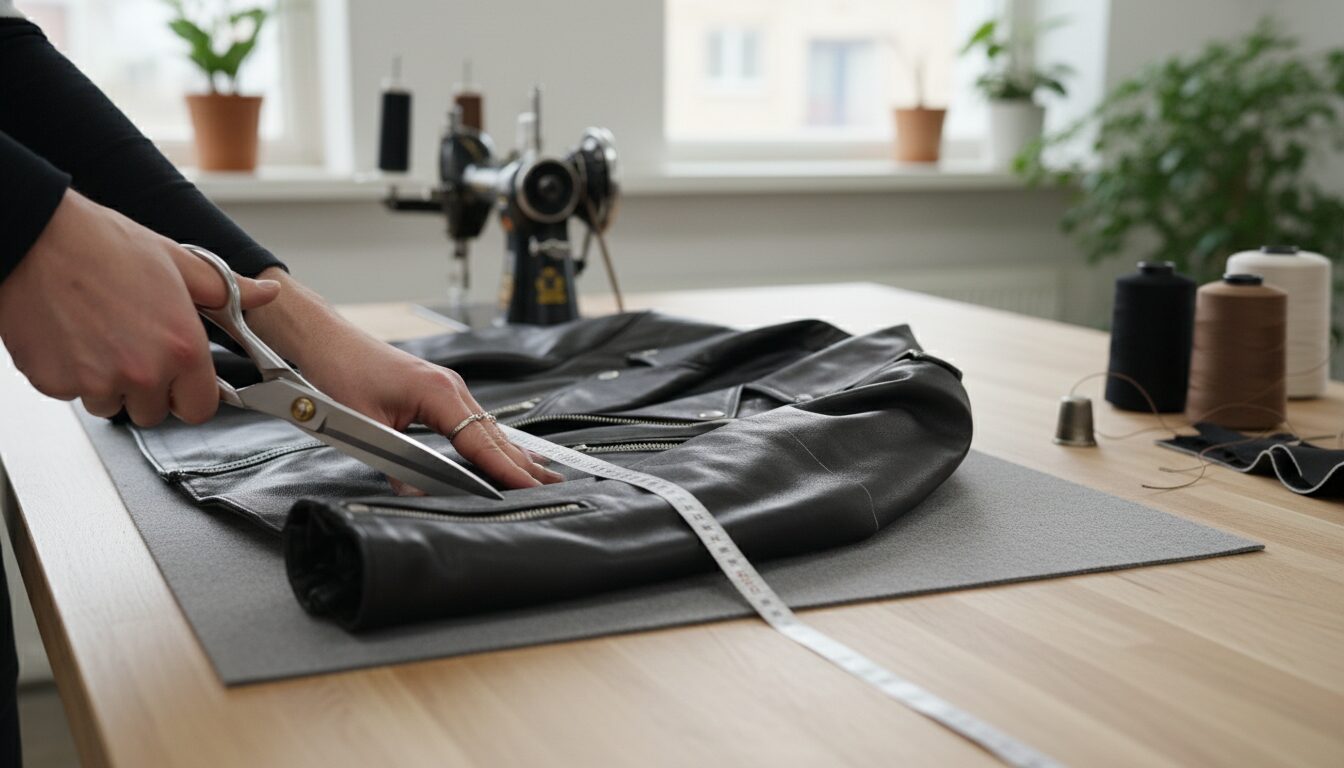
To tailor leather jacket sleeves at home easily, you must first accurately measure the desired length, carefully open the inner lining using a seam ripper, trim the excess leather with a rotary cutter, fold and secure the new hem with binder clips, and sew the cuff using a heavy-duty sewing machine equipped with a size 14 or 16 leather needle and bonded nylon thread. Because needles leave permanent holes in animal hides, preparation and precision are paramount.
Finding the perfect outerwear is a thrilling experience, but discovering that the sleeves hang past your knuckles can instantly ruin the aesthetic. As a seasoned bespoke garment specialist, I have seen countless individuals abandon their favorite pieces purely due to improper sleeve lengths. Altering leather is notoriously intimidating. Unlike cotton or denim, animal hides do not forgive mistakes. A misplaced pin or a skipped stitch leaves a permanent puncture mark. However, understanding the biomechanics of garment construction and utilizing the correct heavy-duty tools can transform a daunting task into a manageable weekend DIY project.
This comprehensive guide will walk you through the exact methodologies used by professional tailors to shorten and taper leather sleeves. Whether you are dealing with a vintage motorcycle jacket, a sleek bomber, or a modern racer, mastering these semantic techniques will elevate your wardrobe and save you hundreds of dollars in alteration fees.
The Anatomy of a Leather Jacket Sleeve
Before you make a single cut, you must understand how your garment is constructed. A standard outerwear sleeve consists of two main layers: the outer shell (the hide) and the inner lining (usually polyester, silk, or cotton). These two layers are attached at the cuff. To alter the exterior, you must always work from the inside out.
Most designs feature a two-piece sleeve pattern, consisting of an upper sleeve and an under sleeve, joined by two seams. When tapering (making the sleeve slimmer), you will primarily work on the inseam (the seam facing your body). When shortening the length, you will need to separate the lining from the cuff, adjust the shell, and reattach the lining. Understanding this dual-layer construction is the foundational secret to professional-grade home tailoring.
Essential Tools for DIY Leather Alterations
Attempting to modify thick hides with standard sewing equipment is a recipe for broken needles and jammed machines. To execute this project seamlessly, you must assemble a specialized toolkit. Here is what you need:
- Leather Needles (Size 90/14 or 100/16): These needles feature a unique wedge-shaped point designed to slice through thick materials rather than merely piercing them.
- Heavy-Duty Thread: Opt for bonded nylon or 100% polyester upholstery thread. Never use cotton thread, as the natural tannins in the hide will eventually rot the cotton fibers.
- Teflon Presser Foot: Standard metal presser feet will stick to the hide, causing uneven stitches. A Teflon foot glides smoothly. Alternatively, apply matte scotch tape to the bottom of a standard foot.
- Binder Clips or Wonder Clips: Never use traditional sewing pins. Pins leave permanent holes. Clips hold the folded edges securely without damaging the surface.
- Rotary Cutter and Cutting Mat: Scissors can create jagged edges. A rotary cutter ensures a perfectly straight, clean cut.
- Seam Ripper: Essential for carefully detaching the lining without tearing the delicate interior fabric.
- Tailor’s Chalk or Washable Pen: For marking your measurement lines accurately.
- Rubber Mallet: Used to pound down and flatten thick seams before sewing, allowing your machine to pass over them without breaking a needle.
Pre-Alteration: The Crucial Measurement Phase
The golden rule of leatherworking is to measure thrice and cut once. The ideal sleeve length for a standard jacket should end exactly at the break of your wrist (the base of your thumb) when your arms are resting naturally at your sides. For motorcycle riding jackets, the sleeves should be slightly longer to accommodate the forward reach of your arms.
Put the garment on and wear the type of layers you would normally wear underneath it. Stand naturally in front of a mirror. Fold the excess material inside the cuff until you reach the desired length. Use binder clips to hold the fold in place. Move your arms around—bend your elbows, reach forward, and cross your arms. If the length feels comfortable and the cuff does not ride up too far on your forearm, use your tailor’s chalk to mark the exact fold line on the outside of the sleeve. Remove the garment carefully to preserve the clips.
Method 1: How to Shorten Leather Jacket Sleeves (Step-by-Step)
Shortening sleeves with plain cuffs (no zippers or snaps) is the most straightforward alteration you can perform at home. Follow these exact steps to achieve a factory-finish hem.
Step 1: Open the Lining
Turn the sleeve inside out. Locate the seam where the inner lining meets the leather cuff. Using your seam ripper, carefully cut the stitches connecting the two materials. You only need to open the lining around the circumference of the cuff. Once detached, pull the lining up and out of the way to expose the raw underside of the hide.
Step 2: Mark the Cut Line and Seam Allowance
Lay the sleeve flat on your cutting mat. You should already have your chalk mark indicating the new finished edge (where the sleeve will end). You cannot cut exactly on this line, or you will have no material to fold under. Measure 1.5 inches (about 4 cm) down from your finished edge mark towards the hand. This 1.5-inch section is your seam allowance. Draw a straight line across the sleeve at this lower mark.
Step 3: Trim the Excess Hide
Using your rotary cutter and a heavy ruler, cut firmly along the lowest chalk line (the seam allowance line). Apply even pressure to ensure you cut cleanly through both the front and back of the sleeve simultaneously. Discard the excess rings of material.
Step 4: Prepare the New Hem
Fold the raw edge up inside the sleeve exactly at your original finished edge mark. The 1.5-inch seam allowance should now be hidden inside. Secure this fold tightly using your binder clips every inch along the circumference. If the side seams feel excessively bulky, place a scrap piece of cloth over the seam and gently tap it with a rubber mallet to flatten the fibers.
Step 5: Stitch the Cuff
Thread your sewing machine with the heavy-duty thread and install the leather needle and Teflon foot. Set your machine to a long stitch length (around 3.5mm to 4mm). Short stitches will perforate the hide too closely together, effectively turning it into a tear-away perforated sheet. Carefully stitch around the cuff, keeping a consistent distance from the folded edge (typically 1 inch). Go slowly. If your machine struggles over the bulky side seams, turn the handwheel manually to guide the needle through.
Step 6: Reattach the Lining
The lining will now be too long for your newly shortened sleeve. Put the jacket back on inside-out, pull the lining down over the new cuff, and fold the excess lining under so it sits about half an inch above the leather edge. Clip it in place. You can either machine stitch the lining back onto the seam allowance of the hide or, for a cleaner, safer finish, hand-sew it using a hidden slip stitch.
Method 2: Tapering Baggy Leather Sleeves
Sometimes the length is perfect, but the sleeves are excessively wide, creating an unflattering “batwing” effect. Tapering slims the profile of the arm. This requires altering the inseam.
Step 1: Pinning the Fit
Put the garment on inside out. Pinch the excess material along the inseam (the seam under your arm extending down to your wrist). Have a friend use binder clips to pinch the excess material together until you achieve a slim, comfortable fit. Ensure you can still bend your elbow without restricted blood flow.
Step 2: Marking the Taper Line
Take the garment off. Use your chalk to draw a smooth, gradually curving line along the edge of where the clips are holding the material. This is your new seam line. Remove the clips.
Step 3: Sewing the New Seam
You must sew this alteration from the inside. Since the lining is in the way, you need to open a small 6-inch hole in the lining seam of one of the sleeves. Reach through this hole, grab the cuff of the sleeve you want to alter, and pull it completely through the hole. The sleeve is now inside out with the raw seams exposed. Sew a straight stitch directly over your chalk line using your long stitch setting.
Step 4: Trimming and Finishing
Once the new seam is sewn, try the garment on (right side out) to test the fit. If it fits perfectly, pull it back through the lining hole. Trim the excess bulk from the new seam, leaving a half-inch seam allowance. Flatten the new seam open with your rubber mallet. Finally, push the sleeve back to its normal position and hand-stitch the small hole in the lining closed.
Handling Complex Cuffs: Zippers, Snaps, and Gussets
Motorcycle and racer designs frequently feature zippered cuffs or snap closures. Altering these at home elevates the difficulty level exponentially. You cannot simply chop off the bottom of a zippered cuff without losing the zipper functionality.
If you must shorten a zippered sleeve, you have two DIY options. The first is to move the zipper up. This involves unpicking the entire zipper, shortening the sleeve as described in Method 1, cutting a new slit for the zipper, and reinstalling the zipper hardware. This requires advanced sewing skills and extreme precision.
The second option is shortening the sleeve from the shoulder. This involves completely detaching the sleeve from the armhole (armscye), cutting the excess length from the top bell of the sleeve, and reattaching it. I strongly advise against attempting a shoulder alteration at home unless you are an advanced tailor, as altering the armscye drastically changes the drape and mobility of the entire garment.
Hand Sewing vs. Machine Sewing: The Saddle Stitch Technique
If you do not own a heavy-duty sewing machine, you can still alter your sleeves manually using traditional leathercraft techniques. Hand sewing is incredibly durable, often outlasting machine stitches.
To hand-sew a hem, you will need two harness needles, waxed linen or bonded nylon thread, and a stitching awl. Mark your hem and fold it as usual. Instead of a machine needle punching the holes, you will pre-punch your holes using the awl or a multi-prong stitching chisel and a mallet. Tap the chisel to create a perfectly spaced line of diamond-shaped holes around the cuff.
Thread a needle onto each end of a single long piece of thread. Pass one needle through the first hole. Then, pass the second needle through the exact same hole from the opposite direction. Pull both ends tight. Move to the next hole and repeat. This is known as the saddle stitch. Unlike a machine lockstitch, if one thread breaks in a saddle stitch, the entire seam will not unravel. This makes it the superior choice for high-stress areas like cuffs.
Troubleshooting Common DIY Leather Sewing Issues
When working with heavy materials, your machine may throw a tantrum. Use this diagnostic table to quickly resolve common issues during your alteration process.
| Problem | Probable Cause | Expert Solution |
|---|---|---|
| Skipped Stitches | Needle is too small or dull; wrong needle type. | Switch to a brand new size 100/16 leather wedge-point needle. |
| Thread Breaking | Upper tension is too tight; thread is catching on the spool. | Lower the upper tension dial gradually. Ensure you are using bonded nylon thread. |
| Material Won’t Feed | Standard presser foot is sticking to the hide. | Switch to a Teflon/roller foot, or place tissue paper between the foot and the hide (tear it away after sewing). |
| Needle Breaking | Sewing over excessively thick, folded cross-seams. | Use a rubber mallet to pound the seams flat before sewing. Turn the handwheel manually over thick bumps. |
| Puckered Seams | Stitch length is too short, acting like a perforation. | Increase stitch length to 3.5mm – 4.5mm. |
When to DIY vs. When to Trust the Experts
While shortening a plain sleeve or tapering a baggy arm is highly achievable for a patient DIYer, there are boundaries to home tailoring. If your garment features intricate quilted padding, complex zippered gussets, or is made from ultra-premium exotic hides, the risk of irreversible damage outweighs the cost of professional alteration.
Furthermore, if the shoulders are too wide or the chest is too tight, these structural issues cannot be easily fixed by tweaking the sleeves. In such cases, investing in a properly fitted garment from the start is the most economical choice. If you’re looking for a flawless fit right out of the box, our trusted partner Celebrity Jacket offers premium designs meticulously crafted to provide superior drape and proportion, eliminating the need for risky home alterations.
Frequently Asked Questions (FAQ)
Can I use a regular sewing machine to tailor a leather jacket?
Yes, most standard home sewing machines can handle lightweight to medium-weight hides (like lambskin or thin calfskin) provided you make the necessary adjustments. You absolutely must swap out the standard needle for a heavy-duty leather needle (size 14 or 16), use heavy-duty polyester thread, and attach a Teflon presser foot. Do not force the material through the machine; let the feed dogs do the work to avoid burning out your machine’s motor.
How much does it cost to have a tailor shorten leather sleeves?
If you decide to bypass the DIY route, professional leather alterations vary based on complexity. Shortening plain sleeves typically costs between $40 and $75. However, if the sleeves feature zippers, snaps, or straps that need to be relocated, the price can easily jump to $100 to $150. Tapering the arms generally ranges from $50 to $90.
Can I tailor faux leather (polyurethane) using these same methods?
Yes, the structural steps for altering faux leather (PU or PVC) are identical to genuine hides. However, faux alternatives are generally thinner and much more prone to tearing. You still need to avoid using pins, but you can usually get away with a standard universal needle (size 90/14) instead of a specialized wedge-point needle, as synthetic materials do not require the same cutting power as animal hides.
What is the best way to fix a mistake if I sew the seam incorrectly?
Because needles leave permanent holes, “fixing” a mistake is about camouflage rather than erasure. If you sew a crooked line, carefully remove the thread using a seam ripper. When you re-sew the seam, you must manually guide the machine’s handwheel to drop the needle into the exact same holes you created the first time. This requires immense patience but ensures the structural integrity and aesthetic of the garment remain intact.
Does leather shrink or stretch over time?
High-quality hides will stretch and mold to your body over time, particularly in high-stress areas like the elbows and shoulders. However, it does not shrink unless exposed to extreme heat and moisture (which ruins the material). When tapering your sleeves, always leave a little bit of breathing room. A sleeve that is tailored too tightly will restrict your movement and put excessive strain on the seams, eventually leading to thread breakage or tearing.
Final Thoughts on Mastering Your Outerwear Fit
Taking a pair of scissors to an expensive piece of outerwear requires a leap of faith, but armed with the right knowledge, it is an incredibly rewarding endeavor. Tailoring leather jacket sleeves at home easily comes down to respecting the material. By utilizing clips instead of pins, measuring meticulously, employing the correct needles, and taking your time at the sewing machine, you can achieve a bespoke fit that elevates your entire silhouette. Remember, the difference between a good outfit and a great one is always in the tailoring. Approach your project with patience, and you will breathe new life into your wardrobe staples.